
QR Coupon
Create your first code
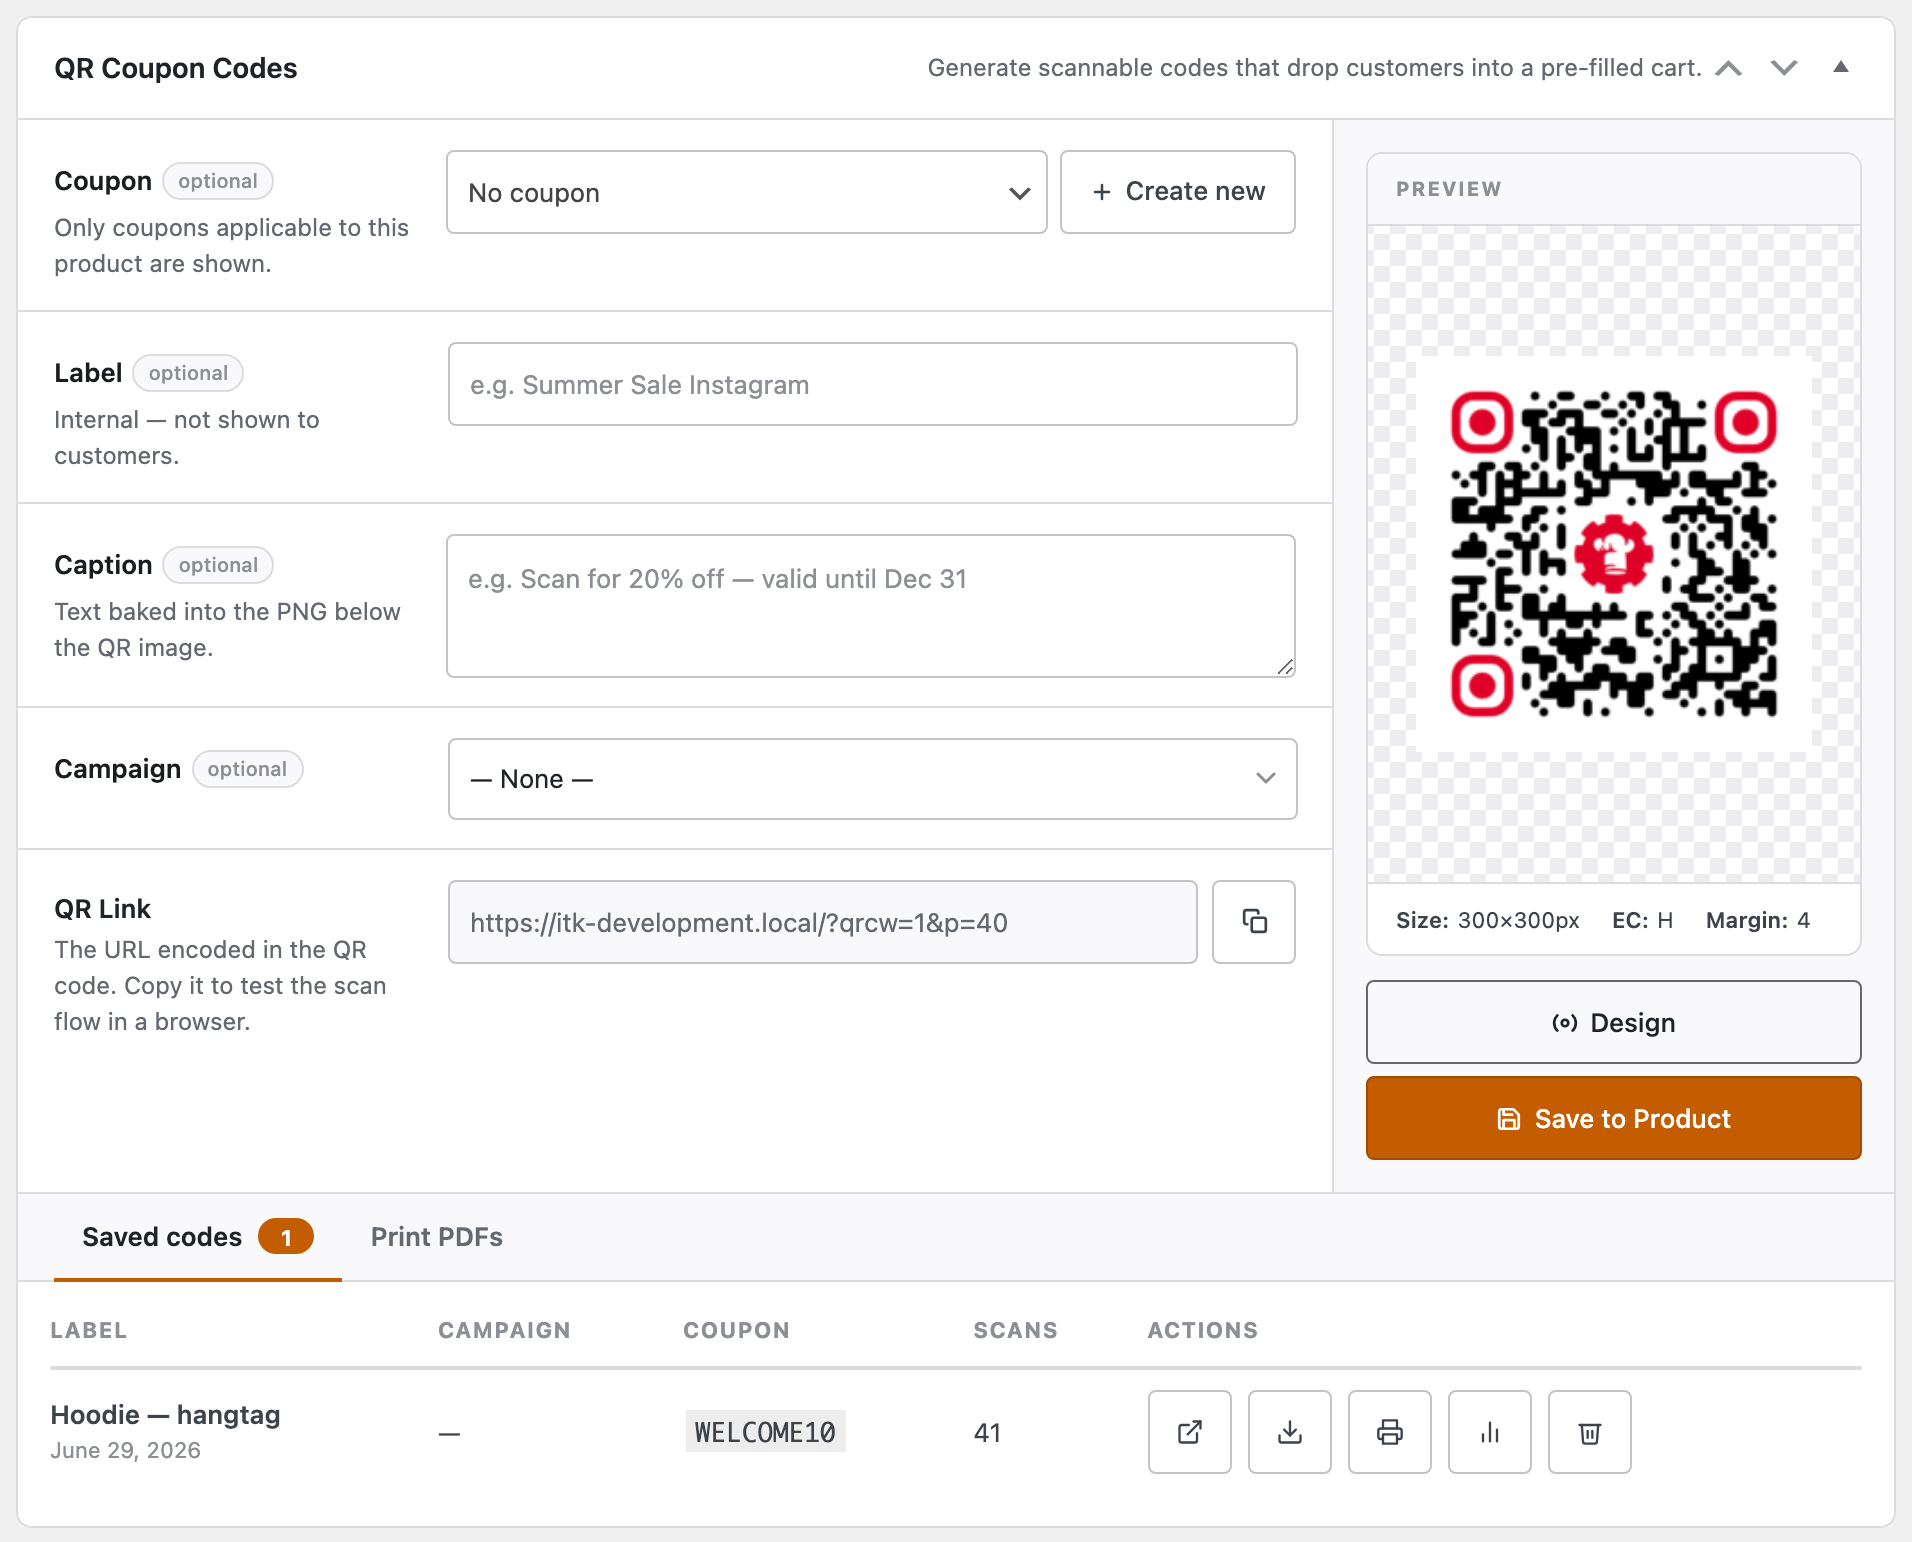
You make codes right where your products live — on the product edit screen. Open any product (Products → pick one) and scroll to the QR Coupon Codes panel. Everything happens here: configure the code on the left, watch the preview on the right, save, and download.
Step by step
- Pick a variation (variable products only) — choose a specific size or colour, or leave it blank to send the shopper to the product page to choose for themselves.
- Choose a coupon (optional) — only coupons that apply to this product are listed. Pick one to bake a discount into the scan, or leave it on No coupon for a plain “scan to add to cart” code. No coupon yet? Create one without leaving the screen with + Create new. Pro
- Add a Label (optional) — an internal name like “Hoodie — hangtag”. Customers never see it; it just helps you tell codes apart later.
- Add a Caption (optional) — short text baked into the PNG beneath the QR, e.g. “Scan for 20% off”.
- Assign a Campaign (optional) — group the code with others to track a promotion together. Pro
- Click Generate QR — the code renders in the preview, with its size, error-correction level and margin shown beneath.
- Save it — the code drops into Saved codes below, where you can open, download the PNG, print, view its scans, or delete it.
Make it match your brand
The preview already uses your saved design defaults — the example above shows branded orange dots and corners rather than a plain black-and-white grid. You can fine-tune the look (dot and corner styles, colours, a logo, a frame) for this one code before you generate it. Just remember the design is locked in once you save, so style it first. Full details on the Design your codes page. Pro
On the free plan you can save one code per product (one per variation for variable products). Pro lifts that to unlimited codes, plus design, print sheets, campaigns and analytics.
Next: Design your codes →